A Beginner’s Guide to Designing and Installing Outdoor Lighting
Outdoor lighting can add ambiance and style to your yard or patio, as well as both increased security and curb appeal. Installing outdoor lighting might seem complicated, but it’s fairly straightforward and can be done without a license as long as the voltage stays low. Here’s what you’ll need to install outdoor lighting in your own yard, and things to keep in mind when you’re deciding on placement and design.
What you’ll need to add outdoor lighting to your yard
To start, you need an outdoor ground-fault circuit interrupter (GFCI) outlet, which is designed to prevent electrical shock or damage when water comes in contact with it. If you don’t have a GFCI outlet already, you’ll need to have one installed by a licensed professional to be safe and meet construction standards.Read More : Energy efficient bulbs lighting the future Once you’ve got your outlet ready, gather up your lights. (We suggest LED lights, because you can use more of them with less power—just make sure you follow the manufacturer capacity limits for your components.) Other tools and materials you’ll need include:
-A low voltage outdoor transformer
-Gel-filled wire nuts for outdoor use
-Wire strippers/cutters
-Your lighting fixtures of choice
-Some low voltage outdoor wire (also known as landscape wire)
Depending on where you plan to install your lights, you will also need appropriate tools for burying your wire. In most cases, a small shovel or trowel will be sufficient, as your cables don’t need to be buried more than a few inches. You can also buy kits that come with all the components you’ll need.
Choose your fixtures and plot out your positioning
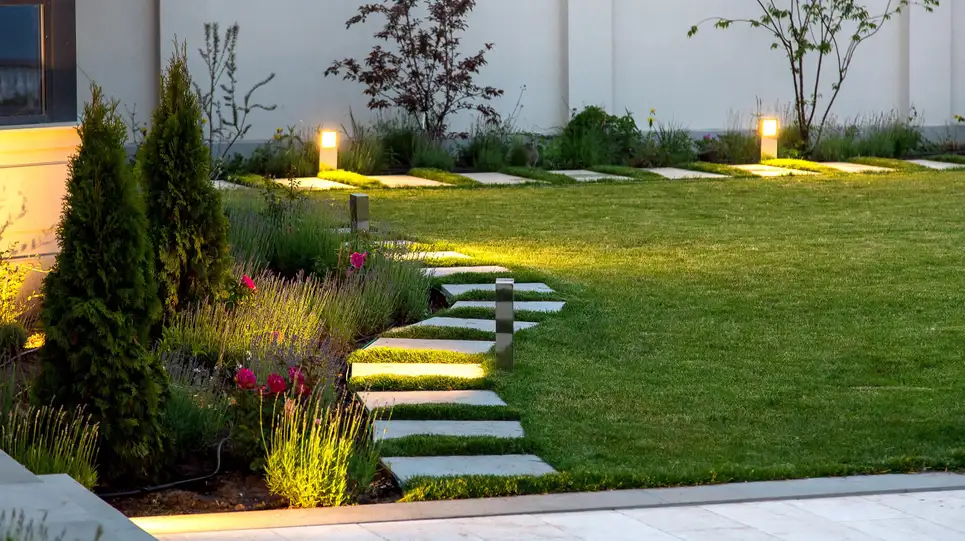
Once you’ve got your materials together, you can begin to plot out where you want your lights to go. To light a pathway, you’ll want to pick a fixture type that can be aimed at the ground, so opt for something adjustable or that is designed to be aimed at the ground. If you want to light up particular areas, like plants, water features, or landscaping, a directional light is the best option.
Designing your lightscape is a matter of taste, but there are some key tips to keep in mind when you’re deciding on placement. For outdoor lighting to look intentional, separate areas from each other so that focal points don’t overlap. For walkways, keep light focused on where you step and away from other parts of the yard to make the walkway safer and look more intentional.
If you do end up with overlapping light pools, try using different angles to add interest and depth to your lightscape. Another benefit to using directional lighting is that it is usually shaded, causing less light pollution, which can affect bats, insects, and birds.
Wire up your lights
Once you have your placement worked out, wiring your lights is fairly simple. If your lights came with quick connectors, replacing those with a gel-filled wire nut might help the connections last longer, especially if they’re buried. Cut off the quick connect at the connector, and strip about an inch off the end of the wires. Then use the wire nuts to connect to your landscape cable. The simplest way to measure your low-voltage wire is to lay it out along the path it will take from your low-voltage transformer to the light. They can be added on in series, one after another, as long as you don’t exceed the recommended number of lights per single circuit per manufacturer specs.
Once you lay out all your wire and cut your lengths, you can strip the ends of your wire and use a wire nut for each wire to connect the lights. Then, you can dig trenches for your wire, a few inches deep—just deep enough to keep the wire protected—and bury your wires. Then, plug in your transformer to the GFCI outlet, and your lights should be ready to use. The order is important here: Wire your lights first before plugging them in. Plugging them in first could lead to getting shocked.
Add some color
Adding some color to your outdoor lighting display is easier than it used to be. You can get color-changing LED lights, and many can be programmed or controlled from a remote. Keep in mind that mixing colors of light has a different outcome than, say, mixing colors of paint because it’s a subtractive rather than an additive color mixing process. White light is all colors of the spectrum, and certain ones are subtracting to make different colors. For instance, mixing red and green light will make amber, and mixing red and blue will make magenta. Keep this in mind when designing the color of your lights so you end up with the hues you want.
What you’ll need to add outdoor lighting to your yard
To start, you need an outdoor ground-fault circuit interrupter (GFCI) outlet, which is designed to prevent electrical shock or damage when water comes in contact with it. If you don’t have a GFCI outlet already, you’ll need to have one installed by a licensed professional to be safe and meet construction standards.
-A low voltage outdoor transformer
-Gel-filled wire nuts for outdoor use
-Wire strippers/cutters
-Your lighting fixtures of choice
-Some low voltage outdoor wire (also known as landscape wire)
Depending on where you plan to install your lights, you will also need appropriate tools for burying your wire. In most cases, a small shovel or trowel will be sufficient, as your cables don’t need to be buried more than a few inches. You can also buy kits that come with all the components you’ll need.
Choose your fixtures and plot out your positioning
Once you’ve got your materials together, you can begin to plot out where you want your lights to go. To light a pathway, you’ll want to pick a fixture type that can be aimed at the ground, so opt for something adjustable or that is designed to be aimed at the ground. If you want to light up particular areas, like plants, water features, or landscaping, a directional light is the best option.
Designing your lightscape is a matter of taste, but there are some key tips to keep in mind when you’re deciding on placement. For outdoor lighting to look intentional, separate areas from each other so that focal points don’t overlap. For walkways, keep light focused on where you step and away from other parts of the yard to make the walkway safer and look more intentional.
If you do end up with overlapping light pools, try using different angles to add interest and depth to your lightscape. Another benefit to using directional lighting is that it is usually shaded, causing less light pollution, which can affect bats, insects, and birds.
Wire up your lights
Once you have your placement worked out, wiring your lights is fairly simple. If your lights came with quick connectors, replacing those with a gel-filled wire nut might help the connections last longer, especially if they’re buried. Cut off the quick connect at the connector, and strip about an inch off the end of the wires. Then use the wire nuts to connect to your landscape cable. The simplest way to measure your low-voltage wire is to lay it out along the path it will take from your low-voltage transformer to the light. They can be added on in series, one after another, as long as you don’t exceed the recommended number of lights per single circuit per manufacturer specs.
Once you lay out all your wire and cut your lengths, you can strip the ends of your wire and use a wire nut for each wire to connect the lights. Then, you can dig trenches for your wire, a few inches deep—just deep enough to keep the wire protected—and bury your wires. Then, plug in your transformer to the GFCI outlet, and your lights should be ready to use. The order is important here: Wire your lights first before plugging them in. Plugging them in first could lead to getting shocked.
Add some color
Adding some color to your outdoor lighting display is easier than it used to be. You can get color-changing LED lights, and many can be programmed or controlled from a remote. Keep in mind that mixing colors of light has a different outcome than, say, mixing colors of paint because it’s a subtractive rather than an additive color mixing process. White light is all colors of the spectrum, and certain ones are subtracting to make different colors. For instance, mixing red and green light will make amber, and mixing red and blue will make magenta. Keep this in mind when designing the color of your lights so you end up with the hues you want.
Source: lifehacker.com
Useful Links:
